Our Linked Dipole will have a 1:1 Balun.
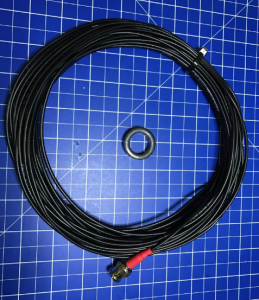
I have bought the Toroid and the 13m Coax cable with the attatched connector from SOTABEAMS.
I have used the following Parts:
http://www.sotabeams.co.uk/balun-toroid/
http://www.sotabeams.co.uk/pre-terminated-co-axial-cable-rg174a-u/
On the SOTABEAMS site where you can buy the Toroid there is a really nice “Manual” where it shows how to wind the 1:1 Balun.
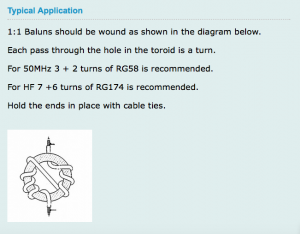
In our case when we will make a Balun for HF we have to make 7 turns on one Site and then 6 turns on the oposite side as shown on the Picture.
Always remember when you wind a Balun or a Transformer a “Turn” is then the cable goes throu the Toroid.
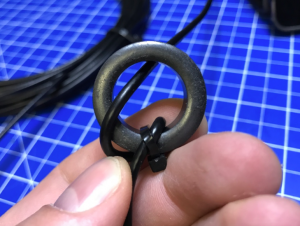
I measured about 50cm from the Coax cable and put it throu the toroid. I fixed the first turn with a small ziptie.
Then you can wind the Balun as shown on the Picture from SOTABEAMS but with the 7 + 6 Turns.
When you are finished winding the coax you can put the a second ziptie on the outcoming Coax Cable.
Now mount the Balun on the 3D-Printed Centerpiece with 2 Zipties and use another 3 Zipties as a strainrelief for the remaining Coaxcable that goes to the Radio.
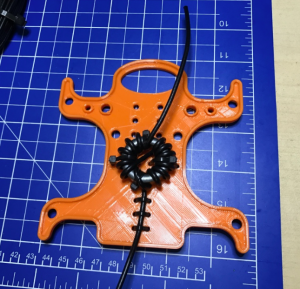
That is the first Part on our way to the Linked Dipole.
Best Wishes
Hoonse